Printable home walkthrough
Termite Inspection Checklist: What to Check Inside and Outside
Last updated: September 2026. This homeowner checklist covers visible, safely accessible areas. It is not a professional wood-destroying organism inspection.
Short Answer
Walk around the home in the same order every time: outside perimeter, foundation and garage, crawl space or basement if safely accessible, living areas, then attic and eaves. Look for visible termite evidence and for conditions that make inspection difficult or termite activity more likely.
Check each item you actually observe. The tool will summarize what you found and route you to a sensible next step. It cannot confirm that a home is termite-free, identify hidden colonies, or judge structural safety.
This checklist is part of our termite identification guides. If you are comparing mud tubes, pellets, wings, damage, or lookalikes, start there before choosing a treatment.
If you are doing routine maintenance rather than documenting suspected evidence, use our zone-based termite prevention checklist.
Stop before entering an unsafe space. Do not crawl into standing water, exposed wiring, unstable framing, heavy mold, animal activity, or an area you cannot exit easily. Do not open walls or probe wood that may be load-bearing. Photograph suspected evidence before touching or cleaning it.
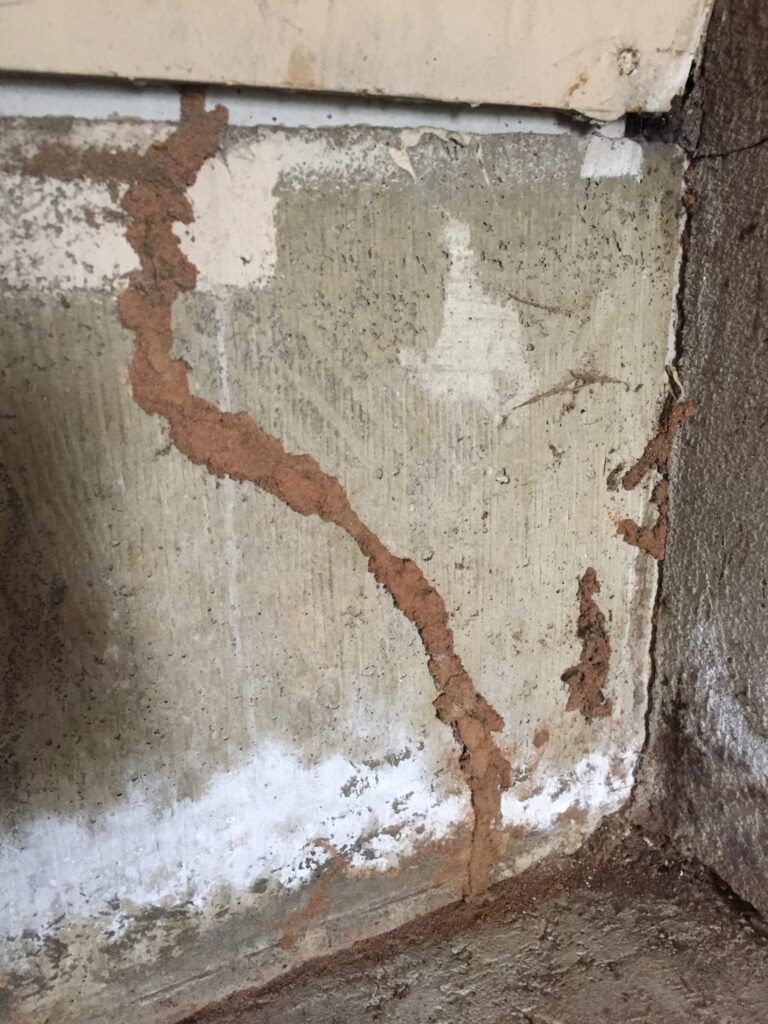
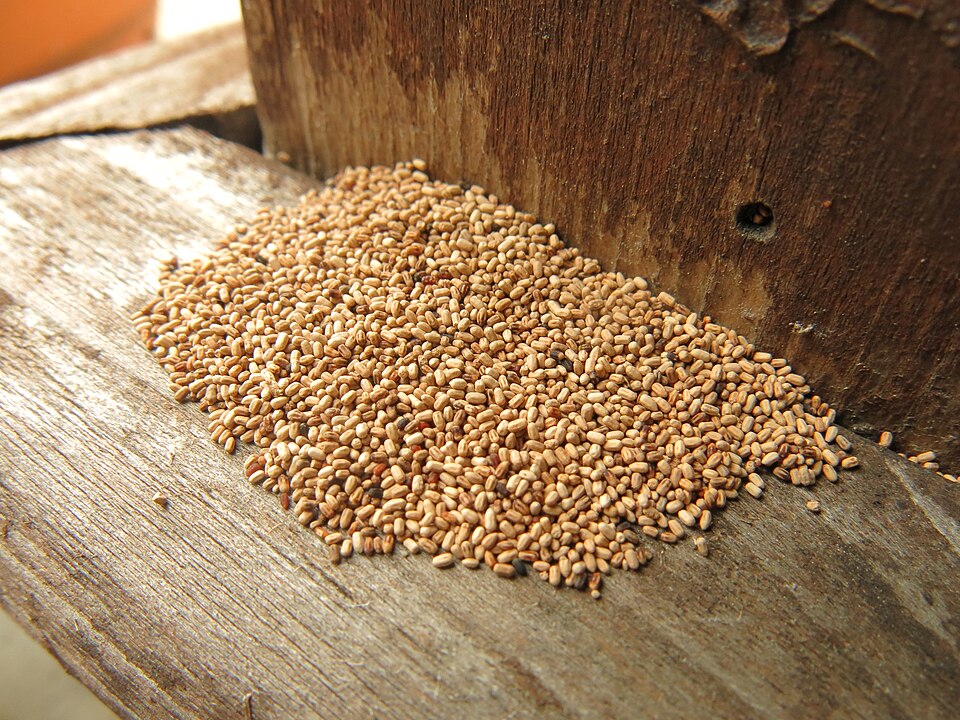
Need help recognizing a clue before you begin? Compare the five main signs of termites. For equipment and its limits, use the separate termite inspection tools guide.
Your Termite Inspection Checklist
Check only what you can see in accessible areas. Leave uncertain items unchecked and write down the location separately.
How to Record What You Find
For each suspected sign, take one close photograph and one wider photograph showing where it is in the room or on the structure. Record the date and location. Do not spray, scrape away, vacuum, or discard the evidence before an inspector has had a chance to see it.
Loose debris can be difficult to identify from a photograph alone. Use droppings vs. frass for debris, flying ants vs. termites for winged insects, and mud tubes vs. old damage for accessible tubes. These comparisons narrow the question; they do not measure the extent of an infestation.
Stop the Walkthrough and Call a Professional When
Arrange a licensed termite inspection when you find live termites or swarmers indoors, mud tubes on the structure, suspected drywood pellets inside, activity in a sealed or inaccessible area, or damage that may affect structural wood. Keep clear of weakened framing and also seek a qualified building professional when structural safety is uncertain.
How to Read the Three Results
No visible evidence
Nothing checked is reassuring but not an all-clear. Hidden areas remain unexamined. Continue periodic checks and use professional inspection intervals appropriate to your region, history, warranty, or transaction.
Conducive conditions
Moisture, wood contact, debris, or blocked inspection space does not prove termites. Correct the condition and keep the area visible so future evidence is easier to detect.
Possible evidence
Document the location and arrange confirmation before choosing treatment. Indoor activity, inaccessible signs, or possible structural damage should move directly to professional inspection.
What This Checklist Cannot Tell You
This walkthrough cannot see inside sealed walls, beneath slabs, behind insulation, or within inaccessible framing. It cannot identify a termite species from damage alone, determine whether old evidence is active everywhere, estimate colony size, or certify a property for a sale or loan.
A completed checklist is a record of visible observations, not a termite report. If damage could also be related to moisture or decay, compare termite damage vs. water damage and have the cause confirmed on site.
What to Do After the Walkthrough
- If you found possible evidence: photograph it, stop treatment experiments, and use the termite decision guide to choose the safest route.
- If you found only conducive conditions: fix leaks, drainage, wood-to-soil contact, storage, and blocked inspection edges, then monitor the accessible area.
- If you found nothing visible: keep the completed checklist as a dated baseline. Absence of visible evidence does not exclude hidden activity.
- If you are preparing to hire: compare written scopes with the questions to ask a termite company and use the termite treatment cost guide for broad price orientation.
The Bottom Line
A useful homeowner check is methodical, documented, and limited to safe, visible areas. The checklist helps you notice evidence and conditions worth acting on; it does not clear the home or replace a licensed inspection. When the evidence is indoors, hidden, active-looking, or possibly structural, confirmation is the next step.
How We Approach These Guides
TermitePlan is an independent decision resource; we are not an exterminator and do not sell inspections or treatments. This checklist is educational and designed to help homeowners document visible observations and choose a next step. See our Methodology.